Download
 Facebook
 Twitter
 Google+
Pandoctor
An Alfred GUI for Pandoc
Version: 1.0
Download from Packal
Introduction
Pandoctor is a
relatively simple, easy-to-use way to
bring the high-powered functionality of
Pandoc
to you. For those new to
Pandoc,
Pandoc is "the universal
document converter". It is an amazingly
powerful utility that allows you to
convert structured text from a ton of
possible input formats to an even larger
number of output formats. 
A potential downside to
Pandoc, however, for many
users is that it is entirely a command
line utility. This means, on the Mac, you
have to open Terminal to use it.
For many Mac/Alfred users, this is at
least slightly daunting. Yet I believe
that this should not be a deterrent to
more people coming to use the power of
Pandoc. This is the reason
for Pandoctor. Now, Alfred
users can enjoy the comfortability and
familiarity of the Alfred interface to
manage Pandoc. Here's how:
Pandoctor is accessed
via
File Actions. The basic file action is "New Pandoc
Conversion", which will kick off a series
of interactive Alfred menus to create your
Pandoc conversion. Once you
have chosen the file you want to convert
and selected the file action,
Pandoctor works in 4 stages:
1. specify the text format of the chosen
file 2. chose the output format you want
for the converted file 3. chose any
options you want for the conversion
process 4. run Pandoc to
convert the input file using your chosen
options
Luckily, Pandoctor is built
to move you through these four steps
seamlessly and without any interaction on
your part aside from selecting and setting
the formats and options you want. Let's
walk through the steps.
Configuration
When you first download
Pandoctor, you will need to
configure a few settings. Luckily,
Pandoctor takes care of this
for you. All you need to do is use the
dr:config keyword to get
everything set up. Once you see the
completion notification, you can start
using Pandoctor for real.
Running a new
Pandoc Conversion
Using the File Action
If you've configured, you begin
Pandoctor by using
Alfred's file navigation abilities
to find the file you want
Pandoc to convert for you.
Once you've found the file, enter Alfred's
File Actions pane for that file (by
default this is →). Then find
Pandoctor's "New Pandoc
Conversion" file action:
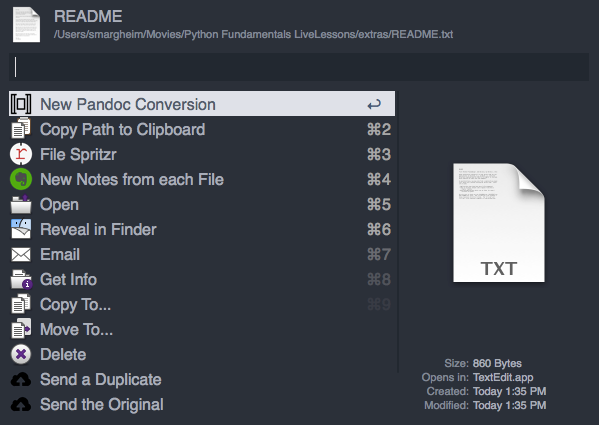
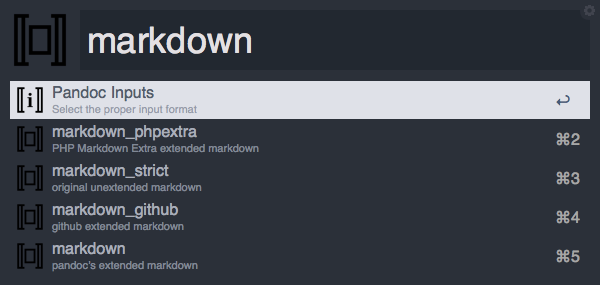
Selecting the Input Format
This tells Pandoctor to begin
a new conversion on that file. Once you
select "New Pandoc Conversion",
Pandoctor will automatically
ask you to choose the format of this input
file:
Pandoctortries to be smart about formatting, so it will pre-fill the search bar with what it believes to be the file's formatting. However, if you need to, you can simply delete this and start searching yourself. You will see thatPandoctordisplays the full name of the input format as well as a short description to help you discern between similar formats (such as the 4 types of MarkdownPandocaccepts).
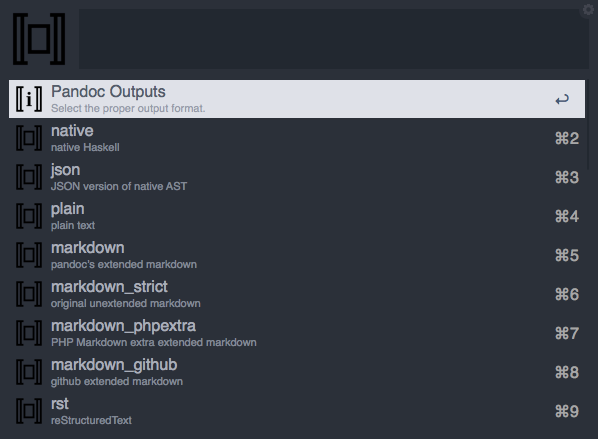
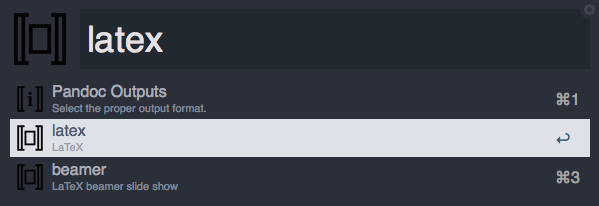
Selecting the Output Format
When you choose the input format,
Pandoctor will then
automatically ask you to select what
format you want the outputted, converted
file to be:
You have access to the full range of possible output formats from this selection. You can use the arrow keys to navigate down, or start searching for your desired output format by name:
Selecting any Options
As soon as you select the output format,
Pandoctor will ask you what
Options you want to add to this
Pandoc conversion:

Pandoctor UI
There are a few elements to the UI that
require more explanation. First, you see
that some items have the inner rectangle
filled, and others do not. This is your
visual cue to determine which options are
active for this conversion (filled) and
which are not (empty).
Pandoctor Default Options
When you first come to this "screen" or
"window" (not sure what to call individual
Alfred windows/pop-ups), you will see that
some options are already filled, even
though you didn't select them. These are
Pandoctor's
Default Options. The file
(pandoc_defaults.json)
specifying which options are by default
always on (filled) can be found inside the
workflow's folder (if you need to open
this folder, you can do so easily using
the dr:help keyword and
selecting Root). This file
also has comments for most options, which
gives some information about them
(Obviously, for detailed information about
Pandoc's options, visit the
User Guide). When installed,
Pandoctor has 4 default
options on:
+ parse-raw * Description:
"Parse untranslatable HTML codes and LaTeX
environments as raw HTML or LaTeX, instead
of ignoring them." + smart *
Description: "Produce typographically
correct output, converting straight quotes
to curly quotes, --- to em-dashes, -- to
en-dashes, and ... to ellipses." +
normalize * Description:
"Normalize the document after reading:
merge adjacent Str or Emph elements, for
example, and remove repeated Spaces." +
standalone
* Description: "Produce output with an
appropriate header and footer (e.g. a
standalone HTML, LaTeX, or RTF file, not a
fragment)."
User Default Options
If you want to set your own default
options (overriding these), you can use
the dr:defs keyword. This
will provide a "window" similar to the
standard Options window, but without
anything selected. Here select whatever
items you want to be on by default for any
new conversion.
Selecting any Options, pt. 2
Back to the
Options Selection, tho. You
will also see that that there are 2 basic
types of options:
+ Boolean + Argument
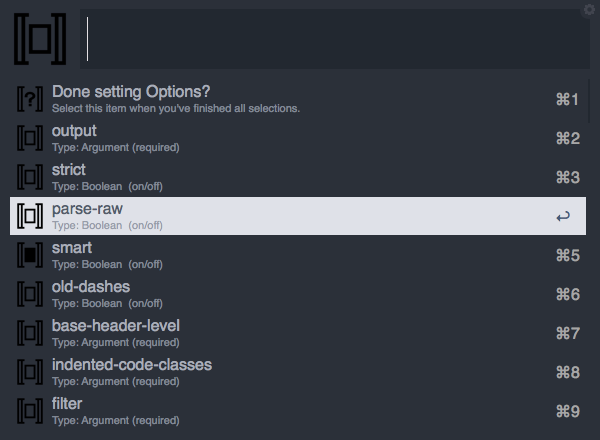
Selecting Boolean Options
If you select a Boolean option, it will
simply "turn on" (the rectangle will be
filled) and this screen will refresh. For
example, here's this screen right before I
choose to "turn on" the
strict option:
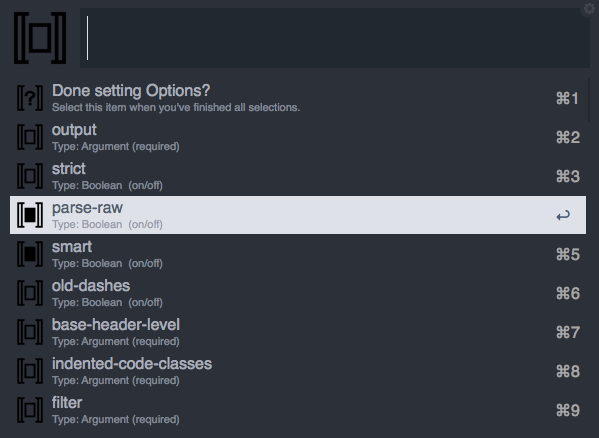
and here's what the screen looks like as soon as it refreshes after I selected that option:
Selecting Argument Options
So, "turning on" Boolean options is
simple. Argument options, however, require
a bit more work. As the name suggests,
this type of option requires more
information (an "argument"). (Again, if
any of this is confusing, I would highly
recommend reading through
Pandoc's
User Guide). This means that you will need to tell
Pandoctor what you want the
"argument", the information, to be. So,
whenever you select an
Argument option, you are
taken to an intermediary "screen" where
you can supply the needed information. For
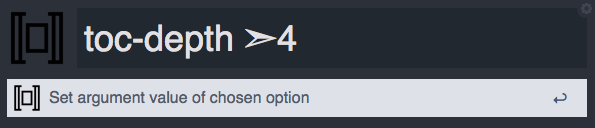
example, if I were to select the
toc-depth argument option, I
would then see this screen:
I would then fill in the information (I want the Table of Contents in the converted file to only go 4 levels deep):
Once you fill in the information, pressreturn(i.e. "Set argument value of chosen option") and return to the base Options "screen".

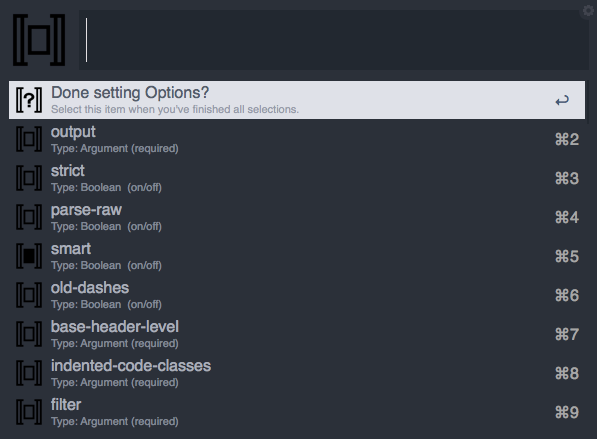
Finalizing Options
Now, as soon as you have set all of the
options you need, you only need to select
the top item on this "screen":
Done setting Options?. This
will close this screen. As I've noted
before, if you instead select an option,
this screen will merely refresh.
Pandoctor UI, pt. 2
A small UI note: there is
always a "header" for every list that
Pandoctor displays. However,
there are 2 different kinds of headers:
+ informational and non-selectable +
interrogative and selectable
The purely informational headers have the
little i in the center. These
headers are found when selecting input and
output formats. They cannot be selected;
they simply tell you what that "screen"
is. The interrogative headers, however,
can be selected. These have the
? in the center. You will use
these to "close" the screen you are
viewing.
Running your
Pandoc Conversion
Returning to the flow of the conversion,
you have just finished selecting all of
the options for your
Pandoc conversion. As soon as
you hit
Done setting Options?,
Pandoctor will begin
processing the conversion. This process
can take a bit of time (particularly when
generating PDFs), but when it is complete,
you will see a notification in the top
right of your screen:
That's all there is to it really. In 4 simple steps, you can convert just about anything. However, for those more inclined toward "power-use", there are a few other abilities underPandoctor's hood.

Ignoring Options
First off, Pandoctor offers
the ability to "hide" or "ignore" certain
options in the Select Options screen.
Pandoc itself offers
a lot of options, and always
seeing them all is often unnecessary. If
there are any options that you
never use, you can simply
remove them. To do this, you need to use
the dr:ignore keyword:
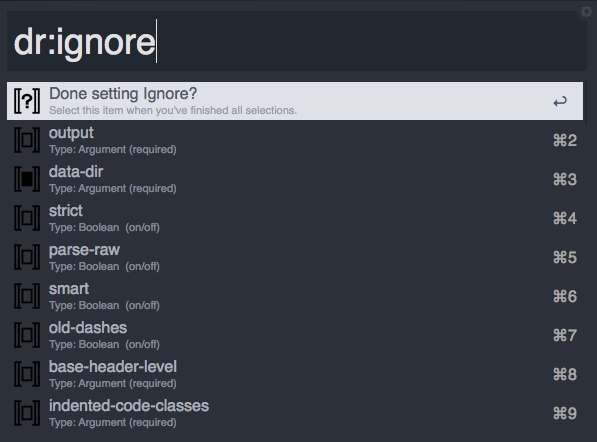
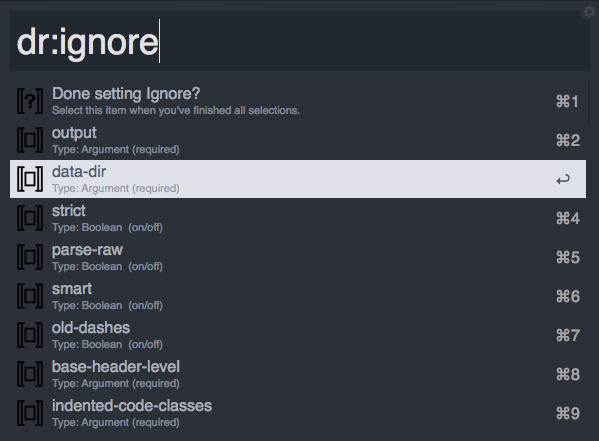
This will bring up a "screen" almost identical to the Select Options screen, but here you are choosing what options are hidden from that other screen. Once again, the two icons are informative. If an item is filled in, this means that it is going to be ignored:
Otherwise (not filled in), it will appear in the standard Select Options window:
As with the basic window, you can search here or just use the arrow keys. Select all of the options you want to ignore, and when you are done, selectDone setting Ignore?to exit.

Template Commands
For those who use
Pandoc frequently, you will
likely use the same basic command over and
over again. If that's the case,
Pandoctor has a "power-user"
feature just for you. In addition to the
"on-the-fly" conversion available via the
"New Pandoc Conversion" file action,
Pandoctor also hase a
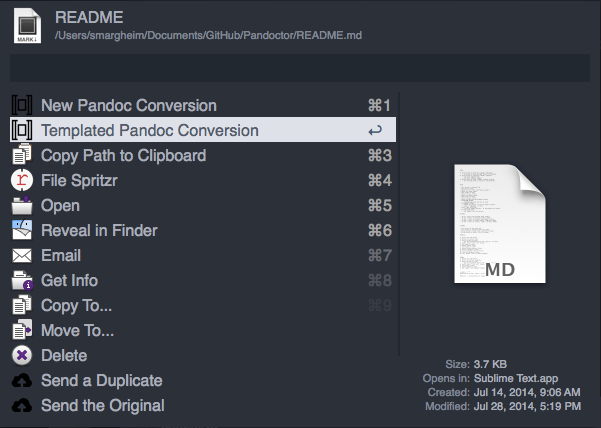
"Templated Pandoc Conversion" file action:
This action grants you access to any and allPandoctemplate commands you have set up. Before I detail how to create a new template, let's briefly discuss the elements of a template.Pandoctorships with a file in the workflow directory that has some sample templates. This file is titledpandoc_templates.json. If you open this file in your text editor of choice, it will look just like this:
Sample Templates
/* PANDOC TEMPLATED COMMANDS <br>
                                        The ``defaults``, at initiation the
                                        `parse-raw`, `smart`, `normalize`, and
                                        `standalone` options, are found at
                                        ``pandoc_defaults.json``. <br> HOW
                                        TO CREATE TEMPLATE: + take your CLI
                                        pandoc command (e.g. "pandoc -s -S --toc
                                        -c pandoc.css -A footer.html README -o
                                        example3.html") + convert all "short
                                        option + space + argument" to "long
                                        option + '=' + argument" (e.g. "pandoc
                                        -s -S --toc --css=pandoc.css
                                        --include-after-body=footer.html README
                                        --output=example3.html") + split all
                                        options into list of individual options
                                        (e.g. [pandoc, -s, -S, --toc,
                                        --css=pandoc.css,
                                        --include-after-body=footer.html,
                                        README, --output=example3.html]) +
                                        remove initial call to `pandoc` and
                                        replace input text path with ``{input}``
                                        variable (e.g. [-s, -S, --toc,
                                        --css=pandoc.css,
                                        --include-after-body=footer.html,
                                        {input}, --output={input}.html]) + make
                                        sure every option is a JSON string (e.g.
                                        ["-s", "-S", "--toc",
                                        "--css=pandoc.css",
                                        "--include-after-body=footer.html",
                                        "{input}", "--output={input}.html"]) +
                                        give it a memorable name + determine if
                                        you want to automatically add your
                                        default options to the command or not.
                                        <br> In order to make your
                                        templates more extensible, you can use
                                        any of 3 built-in variables that relate
                                        to the file chosen to convert: *
                                        {input_file} = The full path to the
                                        file, including file extension *
                                        {input_name} = The full path to the
                                        file, without file extension *
                                        {input_dir} = The full path to the
                                        parent directory of the file <br>
                                        For example, this template would only
                                        work if you kept a project directory
                                        that contained both `biblio.bib` and
                                        `chicago-author-date.csl` alongside your
                                        input file. { "name": "Biblio Test",
                                        "use_defaults": false, "options": [
                                        "-s", "-S",
                                        "--biblio={input_dir}/biblio.bib",
                                        "--csl={input_dir}/chicago-author-date.csl",
                                        "{input_file}",
                                        "--output={input_name}.html" ] } */ [ {
                                        "name": "XeLaTeX PDF", "use_defaults":
                                        true, "options": [ "-N",
                                        "--variable=mainfont:Georgia",
                                        "--variable=sansfont:Arial",
                                        "--variable=monofont:\"Andale Mono\"",
                                        "--variable=fontsize:12pt",
                                        "{input_file}",
                                        "--latex-engine=xelatex", "--toc",
                                        "--output={input_name}.pdf" ] }, {
                                        "name": "Pandoc MD -> HTML",
                                        "use_defaults": true, "options": [
                                        "--toc", "--css=pandoc.css",
                                        "{input_file}",
                                        "--output={input_name}.html" ] } ]
Template Elements
As you can see, it comes with two
"default" templates, as well as one
commented-out template. These are there to
help you see the format of the JSON as
well as Pandoctor's unique
features. As the default templates show,
each template must have 3 keys:
+ name +
use_defaults +
options
The type of value for each of these is
fixed. For name, you must use
a string; for use_defaults,
you use a Boolean (either
true or false);
and for options, you use a
list/array of strings. The
name parameter is simple;
this is the name of your template (what
will be displayed when you are asked to
choose which template you want to use).
The use_defaults parameter is
fairly self-explanatory as well; do you
want to automatically add the default
options to this command or not? It is the
options parameter where the
magic happens, and this is the one that
requires the most precision.
As the comments in the file will tell you,
you need to properly format your
Pandoc command for use as a
Pandoctor template. This
means, each option is its own item in the
list and each option is without spaces
(unless properly quoted). This will
require you to use the "long" version of
any option along with the an equals
[=]. The 3 given examples
give thorough demonstration of what
acceptable templates can look like.
Template Variables
In addition to these formatting
requirements, Pandoctor also
gives you the ability to abstract your
template properly. For any template, you
have access to 3 variables:
+ {input_file} = The full
path to the file, including file extension
+ {input_name} = The full
path to the file, without file extension +
{input_dir} = The full path
to the parent directory of the file
These variables will allow you to properly
use your template with any conversion. You
will see that every template should use
{input_file} and
{input_name} for the input
and output options respectively. In
addition, if you specify any outside
resource files, you can then use
{input_dir} to ensure that
the full path is properly constructed (see
the "Biblio Test" example in the
comments).
Running a Template Command
Once you set up a template, it will make
using Pandoc
so much easier.
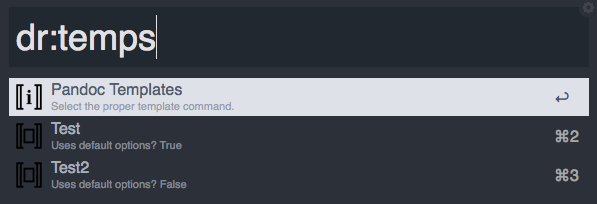
All you have to do is select the file in
Alfred's file navigator, choose the
"Templated Pandoc Conversion" file action,
and then choose which template you want to
use. That's it.
As with the New Conversion, the process takes a variable amount of time. Whenever the conversion does finish, however, you will see a notification in the top right of your screen:

Creating a Template
So, how do you set up template commands?
As the Template Elements section
describes, each template requires 3
things. So, in order to create a new
template, you will need to create each of
these 3 elements. Hopefully, however,
Pandoctor makes this
dead-simple to do.
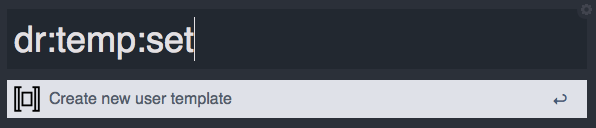
To begin creating a new template, use the
dr:temp:set keyword:
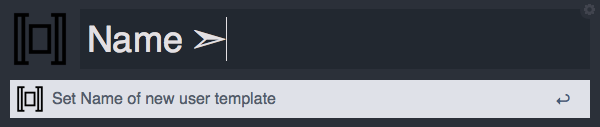
Setting Template Name
Type the keyword and then press
return. This will immediately
jump you to assigning a name for your new
template. This will be the "screen" that
you see:
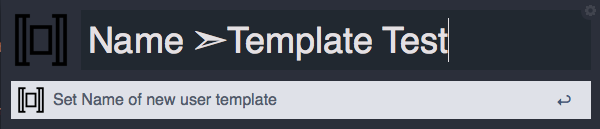
To assign a name, simply type the name of the template. As seen in the screenshot above, this name will be all that you will see in the Script Filter to choose which template you want to run. As an example, I created a new template called "Template Test":
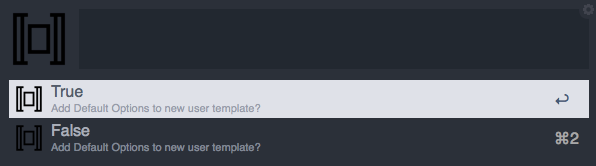
Setting Template Defaults
Once you finish typing your template name,
hit return and
Pandoctor will then
automatically ask you if you want your
Default Options to always be added to the
template command:
If you selectTrue, this means that whatever options your template command has, your assigned Default Options will be added to the finalPandoccommand. For example, if you have setstandaloneto be a Default Option, regardless of whether or not you have that option in your template command,Pandocwill still create a standalong document. If, however, you selectFalse, only the options you have in the template will be run throughPandoc.
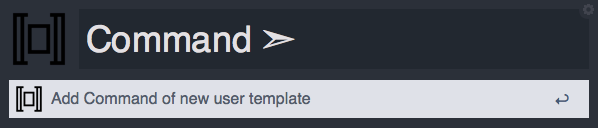
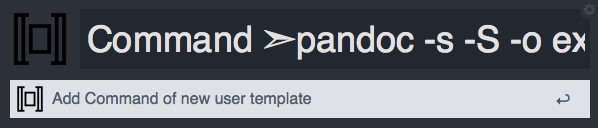
Setting Template Command
The final element you need to add to
create your new template is, of course,
the actual Pandoc command:
As the section above described,Pandoctorrequires your template command options to be in a very specific format. However, mustPandocusers don't actually type commands into Terminal in this format. In order to makePandoctoras simple as possible, I have written a script that will convert the standard, short-formPandoccommand into the long-formPandoctorcompliant format. This means that all you have to do is copy your command from Terminal and paste it into this field:
As it is currently implemented, there is the possibility of some bugs in the conversion process. This means it is in your best interest to double check theuser_templates.jsonfile in your workflow storage folder (you can open this folder easily using thedr:helpkeyword and selectingStorage). Ensure that the variables are properly used. Also ensure that the all of the short-form options where correctly translated into their long-form version. Remember, you can use thepandoc_templates.jsonfile as a guide for the template JSON format.
I think that Pandoctor has a
lot of power, and I hope it proves useful
to you. For example, I wrote this entire
README in Markdown and generated an HTML
file using Pandoctor. If you
have any problems, please let me know.
stephen The Hackademic